To create a site administrator:
1. Log in to the administrator portal as a system administrator.
2. Click Setup > Accounts and either select an existing user or create a new user for whom you want to create site administrator rights.
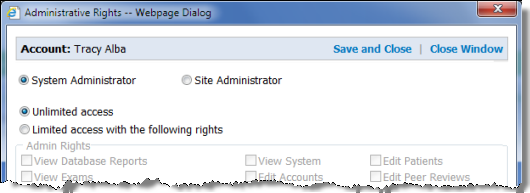
3. Make sure the Administrator check box is selected and click the Edit Rights link.
4. Click the Site Administrator button. A list of all available sites on the system opens.
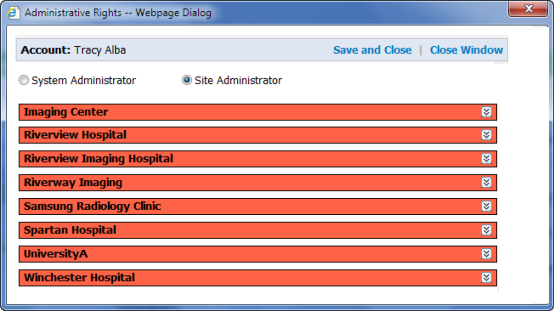
5. Click anywhere on the name bar for one of the sites to expand the rights list. The administrator rights selection window for that site opens.
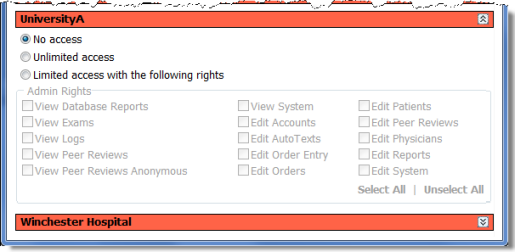
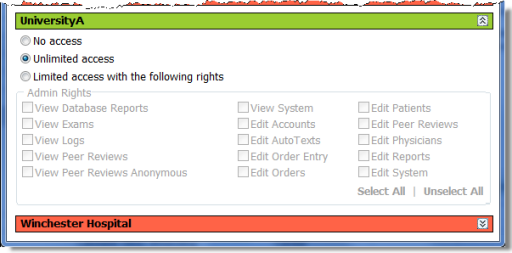
NOTE: By default, No access is selected for all sites.
6. Select one of the three access type buttons:
No access: The user has no administrative rights for the site.
Unlimited access: The user has complete access to this site as an administrator.
Limited access with the following rights: Allows you to assign specific rights to the administrator, limiting the administrative tasks this person can perform for this site. Use the table to help make your choices. Note that the rights fall into two categories: Edit rights and View rights. If you grant an Edit right, you should also grant the corresponding View right.
7. Repeat step 5 and step 6 to configure additional sites for this administrator.
8. When finished, click Save and Close.
TIP: If you need to edit a site administrator’s rights, sites that have been assigned to the user and allow Unlimited access appear with a green bar. Sites that have been assigned to the user and allow Limited access appear with a yellow bar. Sites that have been modified are automatically expanded (see illustration below). Also, you can collapse a site’s rights list by clicking anywhere on the site name bar.