|
NOTE: For this feature to work properly, the site must have imported appropriate CPT code mappings for all procedure codes. |
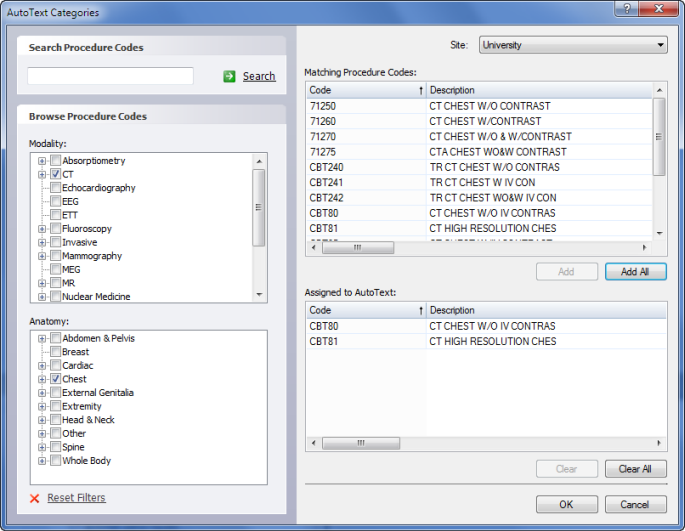
The AutoText Categories window is used to specify procedure codes for which the AutoText is relevant, based on modality and anatomy. For example, if creating an AutoText for CT Chest exams, choose all procedure codes that indicate this type of exam.
To assign procedure codes to an AutoText:
1. Create, or open, the AutoText for which you want to assign categories.
2. Click the Categories icon in the toolbar (or click Edit > Categories on the menu bar; or click a site link located under the Procedures section of the AutoText properties). The AutoText Categories dialog box opens.
3. Find your procedure codes by searching or browsing for the category:
To search, type the specific procedure code or description to find, and then click Search. Use an asterisk as a wildcard to match more than one code; for example, CT* matches all procedure codes or descriptions starting with CT.
To browse, use the Anatomy and Modality filters. Selecting one or more filters limits the procedure codes shown in the Matching Procedure Codes section to those that match the selected filters.
|
NOTE: To clear all of your selections from the Browse Procedure Codes lists, click the Reset Filters link. |
4. From the Matching Procedure Codes section, select the procedure codes you want to apply and click Add. The codes appear in the Assigned to AutoText section.
5. When finished, click OK. The codes you chose appear in the Properties section of your AutoText under the Procedures heading.
