|
 eTIPS eTIPS
Did you know you can extend Multi-Select to All Pages of a Select Dialog?
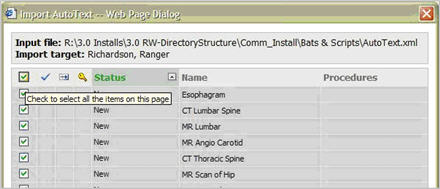
When selecting items in a multiple select dialog, only items on the current page can be selected.
You can verify that the system is configured to select only one page of a dialog by hovering over the Select All box at the top left. If the tool tip says Check to select all the items on this page, then only one page can be selected at a time.
In order to prevent unintended changes by selecting records on all pages instead of the current one, the system default is to only select items on the current page.
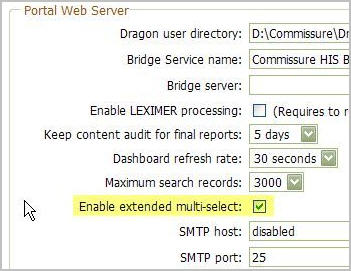
The system configuration setting must be changed to select across pages in order to allow selection across multiple pages. Enable extended multi-select must be checked on the System Configuration page.
To verify or enable this option:
- Navigate to the Portal.
- Choose Setup | System | Configuration.
- Check the box, as shown, for Enable extended multi-select.
- Save and Close the System Configuration Page.
- When opening a multi-select dialog, hover over the Select All box, located at the top left of the dialog, and verify that the tool tip reads Check to select all the items on all pages of the grid.
For more information about this topic, login to iSupport and search for solution 14047: "Extend multi-Select to All pages of a Select Dialog." If you are not an iSupport subscriber, click iSupport Timesaver to learn more about becoming a member.
_______________back to top_______________
Do you know what to back up in the RadWhere System for Disaster Recovery?
To prepare for complete disaster recovery the following items must be backed up to an off-server location.
- Comm1 database (Daily)
- Comm1 transaction logs (Hourly)
- System databases (Weekly)
- Folder x:\Commissure\DragonUsers9* (Weekly)
- Folder x:\Comm_Install* (Monthly)
* Where x is the data/application drive.
Retaining this data off-server will ensure that the system can be completely reconstructed on another server in case of total hardware failure.
For more information about this topic, login to iSupport and search for solution: 13998 "Back Up RadWhere System for Disaster Recovery." If you are not an iSupport subscriber, click iSupport Timesaver to learn more about becoming a member.
_______________back to top_______________
Did you know how to categorize a macro?
When you are in the AutoText editor screen, with a macro in the editing area:
- Click Categorize or double click in the white Procedure box.
- This will bring up the AutoText Categories window
- This window allows the user to select the anatomy, modality and exam /procedure codes to be applied to the selected macro.
Click the play button on the following eTIPS Video image to see a demonstration on how to categorize a macro.

For more information about this topic, login to iSupport and search for solution 12835: “How can a user categorize a macro?” If you are not an iSupport subscriber, click iSupport Timesaver to learn more about becoming a member.
back to top
| 


 To view an expanded What's Fixed listing, by product version, please login to
  iSupport is a Proven Timesaver
 Contacting Support