|
 eTIPS eTIPS
Did you know you could prevent EWS from retaining the previous user's EWS logon name on the EWS Logon page?
In EWS, by default, if you log off and re-launch the EWS login page, the previous EWS user's logon name displays on the screen. For most users who do not share a PC, this is the preferred option and accessed from the Internet Explorer URL:
https://EWS Server Name Goes Here/exv/servlet/PWSLogin
For users who share a PC, where this might not be the preferred option to display the previous user's EWS login name on the screen, you can change the access from Internet Explorer to the following URL, then Install and configure the EXV Web Administration Client:
https://EWS Server Name Goes Here/exv/servlet/DictLogin
NOTE: The address is case sensitive, and you should replace "EWS Server Name Goes Here" with the actual EWS Server name. For example, if the current URL is https://webidc4.ichart.com/exv/servlet/PWSLogin, you would change the URL to https://webidc4.ichart.com/exv/servlet/DictLogin.
Click the play button on the following eTIPS video image for a brief demonstration on how to configure the "remember Login ID" option.

To prevent the EWS logon page from displaying the previous user's logon name:
- Set the Internet Explorer URL for EWS to: https://EWS Server Name Goes Here/exv/servlet/DictLogin.
The File Download - Security Warning displays.
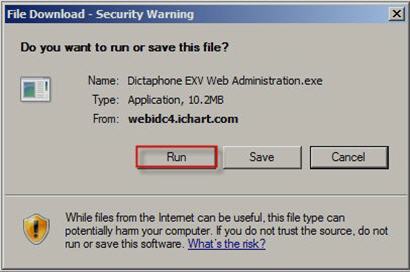
- On the File Download - Security Warning dialog, click Run.
The Dictaphone EXV Web Administration - InstallShield Wizard dialog displays.
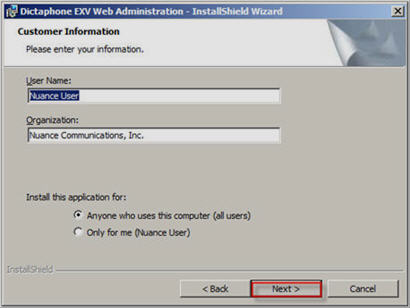
- Select the Install this application for Anyone who uses this computer (all users) option, and click Next. The Destination Folder dialog displays.
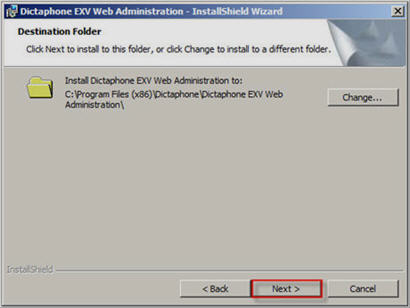
- Click Next. The Ready to Install the Program dialog displays.
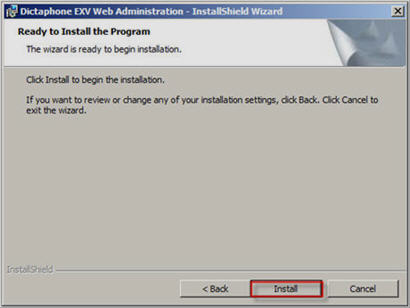
- Click Install, and when the InstallShield Wizard Completed dialog displays, click Finish.
- Refresh the Internet Explorer icon or enter the URL:
https://EWS Server Name Goes Here/exv/servlet/DictLogin.
- Log into EWS with the EWS user's credentials. The following screen displays:
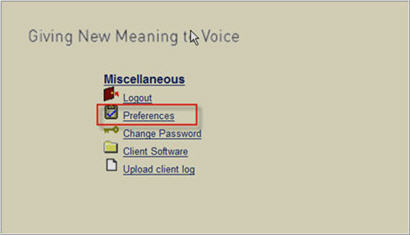
- Select Preferences. The Preferences dialog displays.
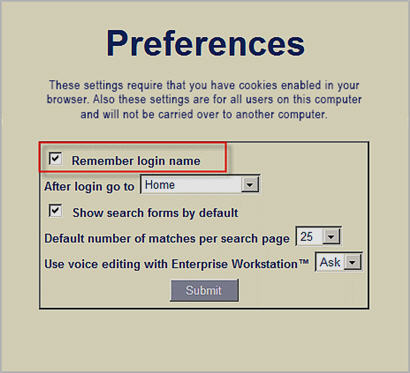
- Uncheck Remember login name.
- Click the log out icon.

The EWS login name box will be blank on the logon screen.
For more operational information about setting log on options for EWS, login to iSupport and search for solution 10207: Enterprise Workstation Operator Manuals. Select the System Administrator Courseware and Reference Guide pertaining to your version of software.
If you are not an iSupport subscriber, click iSupport Timesaver for information about how you may become a member.
_______________back to top_______________
Did you know you could set advanced routing conditions for routing scripts, routing script items, and the route destinations for a completed document?
When the DESS TextSystem server receives a completed document, the system reviews the document for routing instructions. First, it determines whether routing scripts applicable to the document are in blended or exclusive mode. Then, it checks for routing scripts with precedence or priority over others. Finally, it checks for any advanced routing conditions that apply.
To add a routing condition to a routing script:
- From DESS TextSystem Explorer application, locate the routing script in either the global or site-specific routing script folder.
- Right-click the routing script that you wish to edit.
- From the shortcut menu, select Edit Routing Script. The Edit Routing Script dialog displays and lists the available routing script items for the selected script.
- Select the Advanced tab.
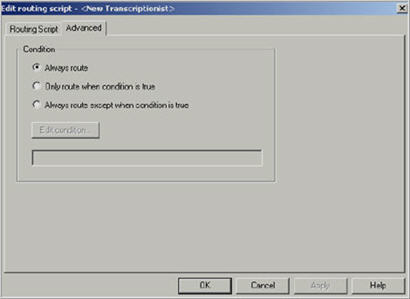
- Select one of the Conditions for the script to set, Always route, Only route when condition is true, or Always route except when condition is true.
- If Only route when condition is true or Always route when condition is true is selected, click Edit condition. The Edit Condition dialog displays, shown below. If Always route is selected, skip to step 10.
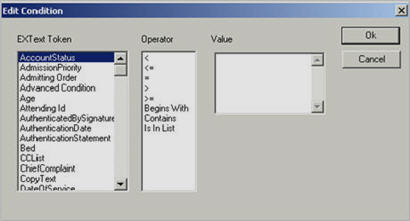
- From the EXText Token list, select a token.
- From the Operator list, select one of the operators: <, <=, =, >, >=, Begins With, Contains, or Is in List.
- Enter a value in the Value field. When using Is in List, you may enter multiple values separated by a comma.
- Click OK, and then click OK again to close the Edit Routing Script dialog.
To add a Routing Script Item to a script:
- From the Edit Routing Script dialog, select the Routing Script tab.
- From the Send document to list, select the routing script you wish to edit.
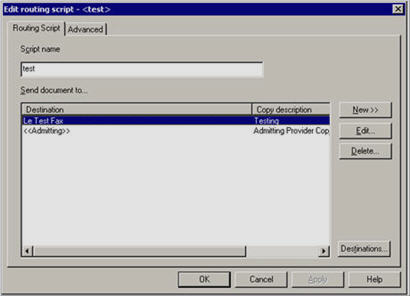
- Click Edit.
- Repeat Steps 4-10 in the To add a routing condition to a routing script section of this article.
To add a condition to a Routing Destination:
- From DESS TextSystem Explorer application, right-click the site level, and select Routing Destinations.
- Select a tab (Printers, FAX, Email, Batch Routing), and select the routing destination that you wish edit.
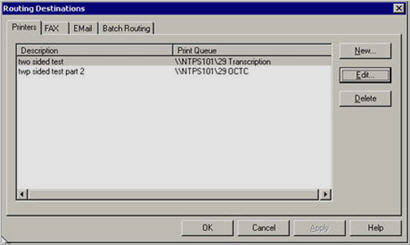
- Click Edit.
- Repeat Steps 4-10 in the To add a routing condition to a routing script section of this article.
Any report using these scripts, Items or Destination will have to pass all the advanced conditions before the document routes. Setting these options provides the user with more control of what documents are qualified to route, when the documents are routed, and where the documents route.
For more information about routing scripts, login to iSupport and search for solution L-2955-006: Enterprise Text, System Administrator Courseware and Reference Guide.
If you are not an iSupport subscriber, click iSupport Timesaver for information about how you may become a member.
_______________back to top_______________
Did you know you could verify and change the status of a DESS VoiceSystem job by running a Quick Report in Job Lister?
Sometimes after a Medical Transcriptionist (MT) is recovering from an EXEditor exception error or application lockup due to network outages, the DESS VoiceSystem will not download jobs to this MT upon login.
This communication disconnection occurs when the DESS VoiceSystem Server does not receive proper signaling indicating that the user, MT, has been disconnected or logged off. As a result, there may be DESS VoiceSystem jobs left in the XFR (Transferred) status that remain assigned to this MT. If the number of XFR status jobs assigned to this MT meets the MT's download quota, the system will not download any jobs. Therefore, the MT will not see any jobs listed in the EXEditor job queue upon successful login after an exception error.
To resolve this issue, the MT or MT's supervisor must access these XFR status jobs that are assigned to the MT, and change the status from XFR back to READY status. A simple Quick Report in Job Lister can allow you to determine the job status so you can change an XFR status of a job back to Ready.
To run a Quick Report and change a voice job from XFR status to Ready status:
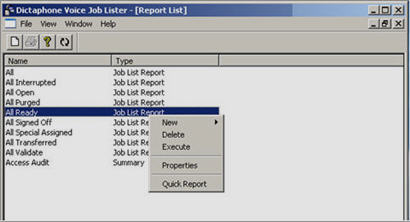
- From Job Lister, right-click on any pre-existing Job Lister report and select Quick Report.
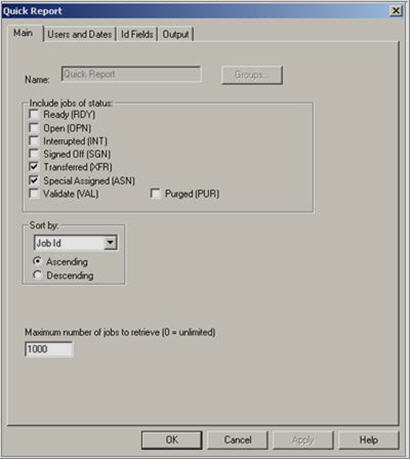
- From the Main tab, Include jobs of status area, select Transferred (XFR) and Special Assigned (ASN).
- From the Users and Dates tab, enter your Transcriptionist ID, and click OK.
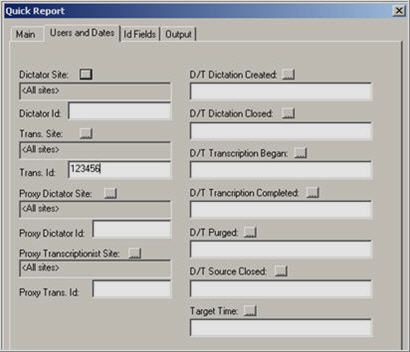
The results of the search show which jobs have been Assigned or Transferred to you.

- Right-click the job with the XFR Status, and select Mark > Ready.
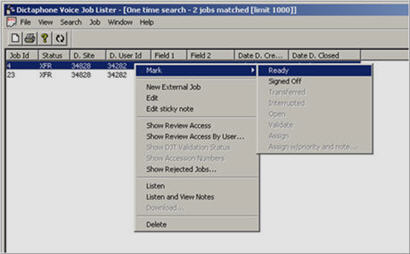
This will remove the jobs that the DESS VoiceSystem identifies as transferred by the EXEditor client application. When you log back into EXEditor, voice jobs in your pool script should start to download.
For more information about Quick Reports, login to iSupport and search for Resource Document #EEVA071, Using Job Lister Quick Reference Instructions.
If you are not an iSupport subscriber, click iSupport Timesaver for information about how you may become a member.
back to top
|