|
 eTIPS eTIPS
Did you know a Radiologist can create a start template to auto-populate content into each new dictation?
A Start Template is a handy feature for Radiologists who prefer to begin each report with the same content, such as; specific tokens or placeholders for dictation.
Click the play button on the following eTIPS video for a demonstration on how to:
- Create and populate a template
- Set the template as the start template
- Configure the system to use the start template
- See the start template in action

For addition information on how to create templates in PowerScribe, login to iSupport and search for solution 10129: PowerScribe for Radiology User Documentation. Click the link to the left of the "System Administrator Courseware and Reference Guide" that is related to your version of software.
If you are not an iSupport subscriber, click iSupport Timesaver for information on how you may become a member.
_______________back to top_______________
Did you know you can disable the mouse functionality of the PowerMic II?
The mouse functionality on the PowerMic II can be disabled by accessing the Mouse settings in the control panel on your PC. Once disabled, buttons to the left and right of the pointing device along with the trigger button on the backside of the PowerMic II will no longer work. The scan button and the buttons located on the top half of the PowerMic II are not affected by disabling the Mouse.
Perform the following to disable the Mouse function on the PowerMic II:
- On the task bar, click the start button and select Control Panel.
- Double-click the Mouse icon to open the Mouse Properties dialog box.
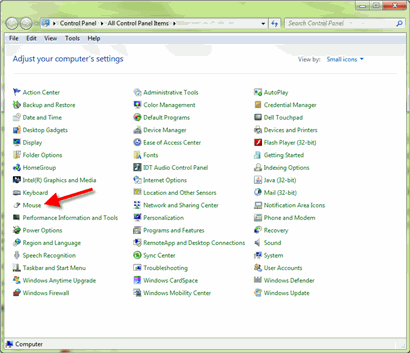
- Click the Hardware tab.
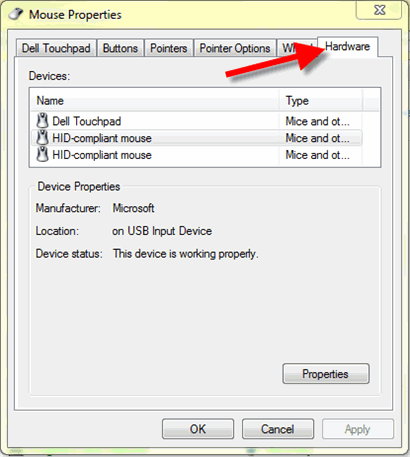
- In the Devices area, click HID-compliant mouse so it is highlighted.
- Click the Properties button to open the HID-compliant mouse Properties dialog box.
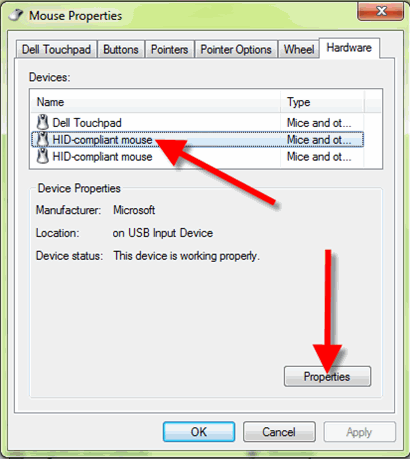
- Click the Driver tab.
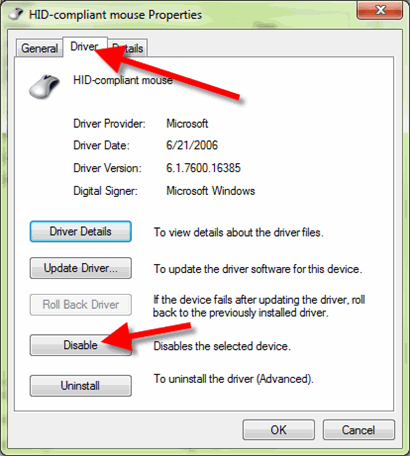
- On the Driver tab, click the Disable button.
- Click the Yes button to confirm the change.
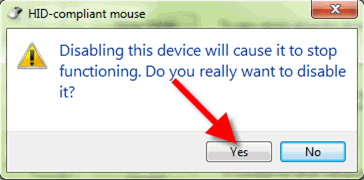
IMPORTANT: At this point, either the Mouse is disabled or the mouse functionality on the PowerMic II is disabled. If the mouse is disabled, simply click the Enable button to re-enable the mouse and then go back to step 4 and choose a different device.
- Click the OK button to save the change and return to the Mouse Properties dialog box.
- Click OK to save and exit.
_______________back to top_______________
Did you know there is a Customer Technical Administration guide that includes comprehensive checklists to help keep your PowerScribe system healthy and performing optimally?
Have you ever wondered if your PowerScribe system is maintaining good health and performing optimally? To assist you with ensuring your system is continuously optimized and running at peak performance, Nuance has published a "Customer Technical Administration" guide for PowerScribe versions 4.X and 5.X. This guide includes comprehensive checklists covering all functions, actions, and maintenance tasks necessary keep your system running at peak performance.
To access the "Customer Technical Administration" guide, login to iSupport and search for solution: 10129 "PowerScribe Operator Manuals." Open the Guide by clicking the document number 889575 - Customer Technical Administration. If you are not an iSupport subscriber, click iSupport Timesaver for more information.
back to top
|